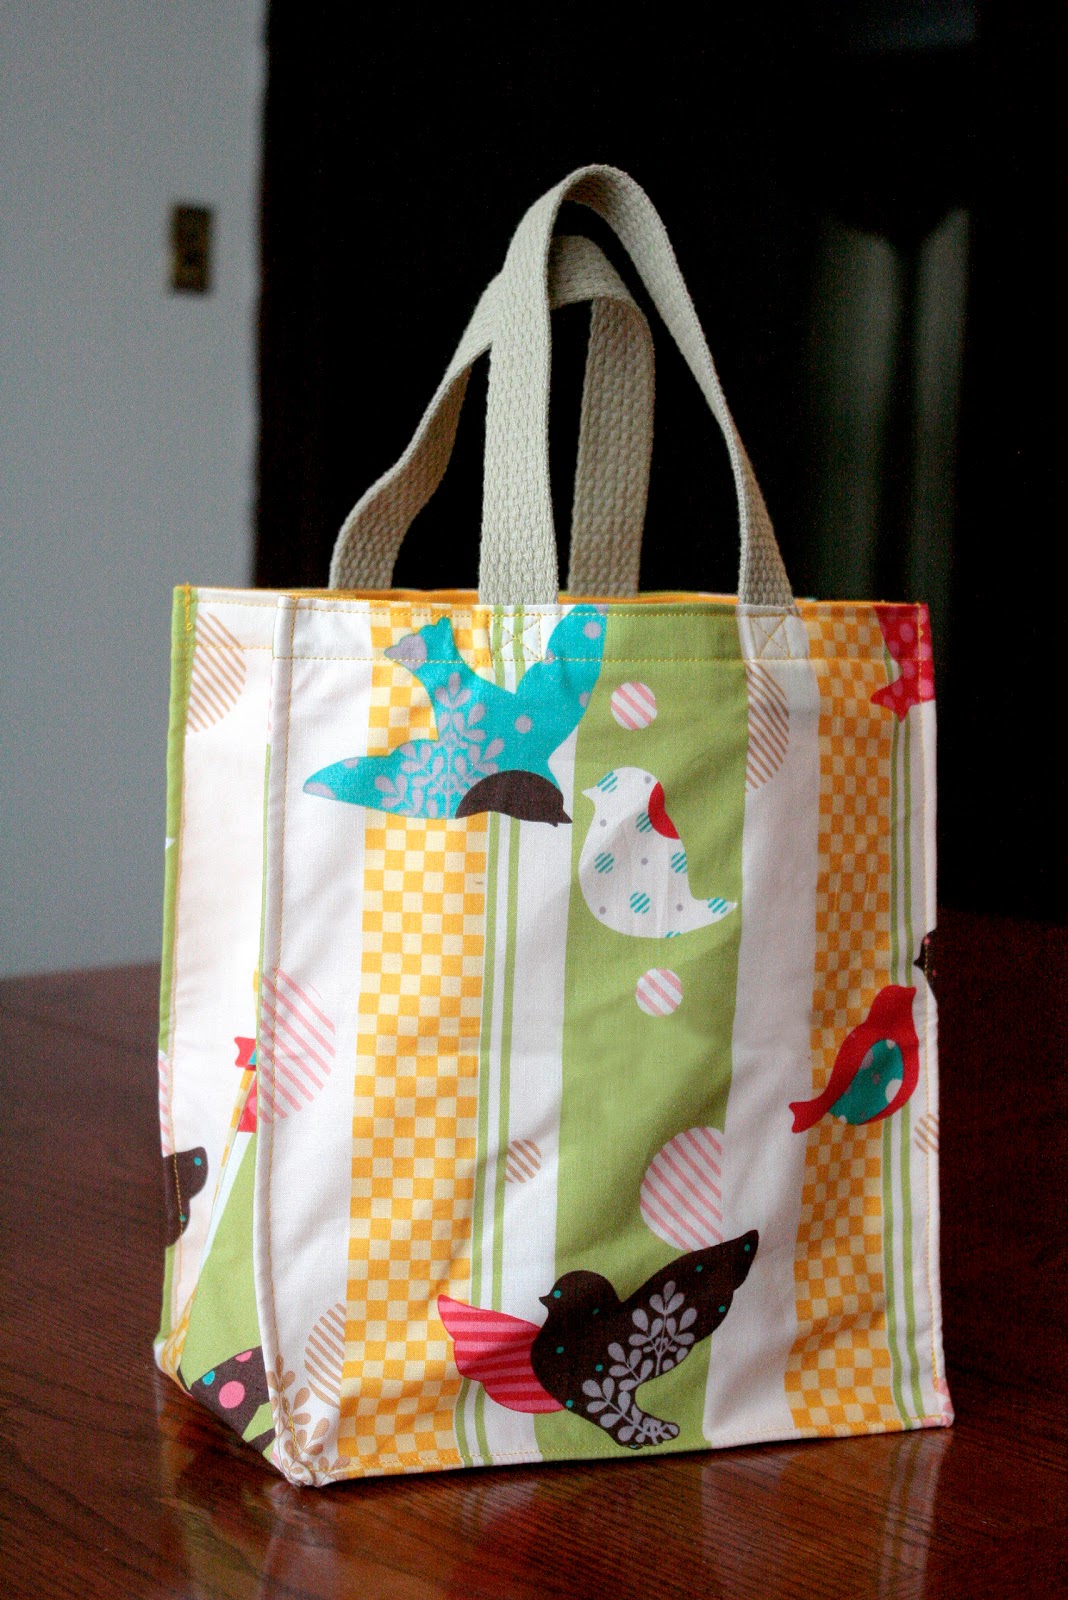
This is one of the very first tutorials I put together! We posted it back when we had just launched Craftbuds and before we had many followers. My totes continue to be something I often use, so here’s the tutorial for making a homemade tote bag.
I’d also like to invite you to check another tote bag tutorial we have posted more recently.
You can scale the size up or down for whatever purpose you have in mind. I make two sizes generally. One is a small tote that’s great for a few toys, extra shoes, or even wrapping up a gift. The larger size is great for groceries, farmer’s markets, extra toddler clothes/toys when going out for the day, or as a beach bag. It’s about the same size as a paper grocery bag.
- Check: Annie’s large selection of Tote bag patterns and tutorials
- Check: Home Sewing Depot Tote bag Patterns and Tutorials
For this pattern, you’ll need an outer and liner fabric. I like at least one of the fabrics to be heavier to help the bag hold its shape a little better. All seam allowances are 1/2″ unless otherwise noted.
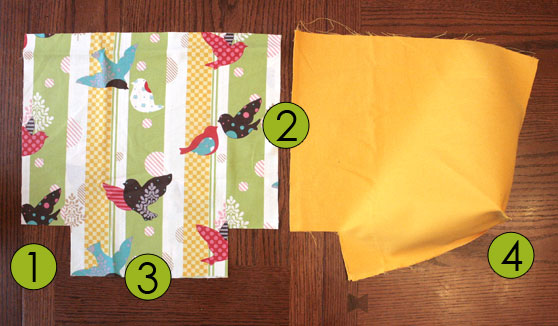
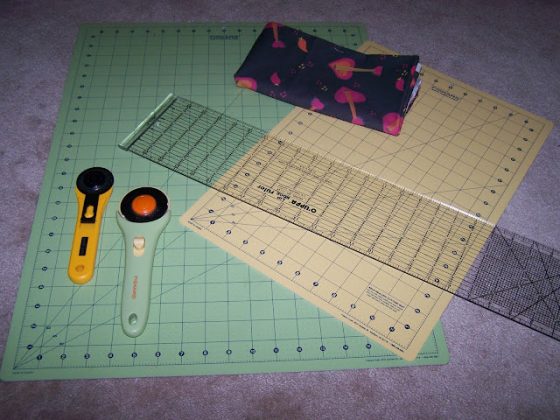
Step 1
Small size: Cut 15″ squares from both your outer and lining fabric with the centerfold of the fabric at the bottom of the square. (If you do it this way, you’ll be cutting through two layers of fabric, and if you were to open it up, you would have a rectangle of 15″ x 30″.) Cut a rectangle 2 1/2″ tall by 3″ wide at each of the bottom corners. If the fabric you’re using doesn’t allow you to have the centerfold at the bottom, you’ll cut two rectangles from both fabrics 15″ wide by 15 1/2″ tall, and your corners will be 3″ square.
Step 2
Put the right sides together for the outer fabric, then stitch up the sides. Repeat with the lining fabric.
Step 3
Stitch that together if you have a raw edge rather than a fold at the bottom.
Step 4
Create the bottom of the bag by stitching the corners. See below for photo detail. You’ll stitch all 4 corners (the 2 for the outer fabric and the 2 for the liner).

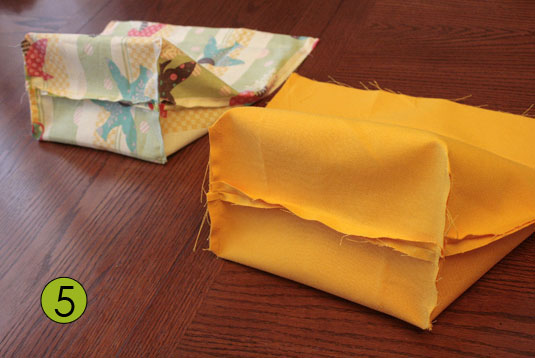
Step 5
Your outer fabric and lining fabric should now look like the photo below, and you can iron the seams flat.
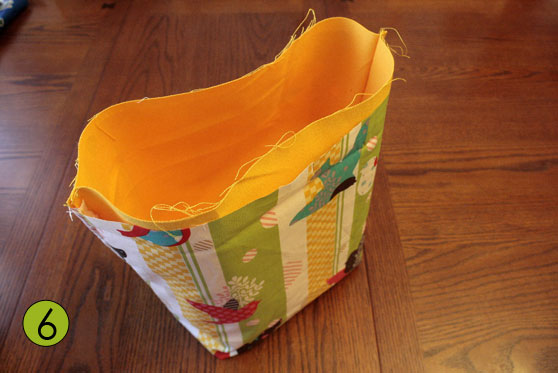
Step 6
Now, flip the outer fabric right side out, then nestle the liner inside.
Step 7
Now pin along the bottom of the bag on the front and back, but not the sides. Stitch along the edge with a 1/8″ or 3/16″ seam allowance.

Step 8
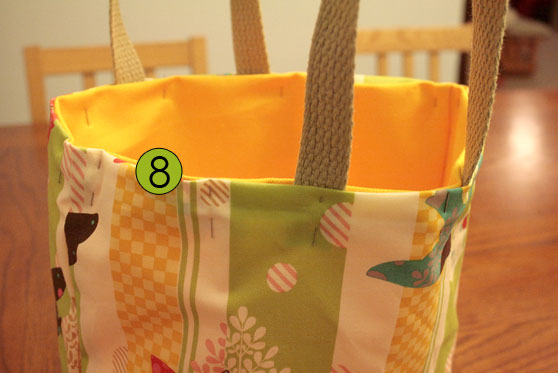
Step 9
Now stitch around the top. Leave a 1/8″ seam allowance at the top and sew a second seam 3/4″ down from the top. Then go back and put an X over each strap. Or, if you don’t want to go back and do the Xs later, see the diagram below for the exact steps I followed.


Step 10
Optional: If you want your tote to have a boxy shape, pin the 4 sides straight up from each corner, then stitch 1/8″ in from the edge as you did in step 7 around the bottom.

And now you’re all done! You should probably go shopping to test out your new bag now!


70 comments
I love, love, love this fabric – where is it from?
Thanks Allison! The fabric is called In Flight (in pistachio) from the “It’s a Hoot” line by MoMo for Moda.
THANK YOU – a tote like this is on my “to do” list; thanks for relieving me of the need to puzzle out the math all by myself!
Thank you! I have often wondered how to get nice boxed edges like that and you’ve just explained it beautifully.
Great tutorial! And perfect timing too….my tote is on its last legs!
Love the bag and fabric!! Great tutorial. Stopping by from Skip to my Lou.
Come on by my blog when you have a moment:
https://craftybrooklynarmywife.blogspot.com/2011/05/wool-buffalo-check-coat-finished.html
Fantasticv tutorial – and as other commenters have noted, the fabric is just gorgeous. Thank you so much for sharing this 🙂
Great tutorial! I was looking to make a bag just like this a few weeks ago, and couldn’t find what I was looking for. So I just freelanced and made something else entirely. Next time I’ll come back here!
Thank you so much for the tutorial. I love making tote bags!
Very nice. I’d love for you to link up at Inspire Me Mondays @ Singing Three Little Birds
https://singingthreelittlebirds.blogspot.com/2011/05/inspire-me-monday-thanks-for-stopping.html
totally in love with this! SOOO CUTE
Thanks Julie! Just linked up and added your button to our Linky Party page.
Love the fabric you chose! Really nice tutorial!
This is such an awesome tutorial! I am in desperate need of a new library bag for my kids and this looks like it would be a perfect fit for all of the books we drag home with us.. we are literally the librarians’ best friends! Thanks so much for sharing with the Pink Hippo Party! Can’t wait to see what you share next week!
great bag!
Thanks for the tutorial…I always love to have a good tutorial! Bookmarked!
I found your blog through Someday Crafts! Great job on your tote bag tutorial! I love making them as gifts… they come in handy and everyone always loves homemade goods! Please stop by Sew Woodsy and link up this project!
Stopped by and linked up!
Great tutorial! I really need to make me a few cute bags like this! I am a teacher and always needing extra cute bags! Thanks for sharing!
Great tutorial! New follower here from Whimsy Couture link up! 🙂
oh how cute! the fabric is what drew me in to click on this! great detailed tutorial. I love sewing but I hate doing sewing tutorials because I break all the rules lol. 🙂 hopped over from blue cricket today!
thestyleprojects.blogspot.com
Hi from your newest google follower/s via crafty soiree, Karima from
http://www.karimascrafts.com
and
http://www.karimasblogs.blogspot.com
Now I want a sewing machine more than ever……Just so I can add more totes to my already out of control collection…LOL
Thanks for sharing!!!
This is such a cute tote bag!!! I love the tutorial – you did a great job! Thanks for linking up to Think Pink Sundays – I featured you today! https://www.flamingotoes.com/2011/05/crush-of-the-week-think-pink-features-7/
Thanks for the feature! We are honored. 🙂
Just wanted to let you know that we LOVED your project!! It will be featured tomorrow at Sweet Peas & Bumblebees! 🙂
Thanks so much Briana! We’re actually doing some giveaways right now that include a bag just like the one in the tutorial. The giveaway ends Friday. Thanks again for the feature!
I love this fabric! Can’t seem to find it anywhere though 🙁
Glad you like it! Sadly it’s getting harder to find. If you do a search on etsy for “in flight moda” there’s a few sellers that offer it!
LOVED this tutorial! Thank you so much. Here is my version: https://makelemons.com/2011/06/large-canvas-tote/
So, for the smaller bag I would need about a half a yard of each fabric? Is this correct?
Yes, for the small bag you’ll need 15″ x 30″ total of each of your two fabrics so you should need just a little under a half yard (as long as it’s at least 30″ wide).
Yep, a half yard cut (18″ x 45″) of each fabric (outside and lining) would do for the smaller bag, and you’d probably have enough scraps leftover for a change pouch. 🙂
Thanks Ladies! I will post pics when I am done with them!
Love this…very clear instructions on how to make the box corners. Thank You! What a great idea to make for gift holders…the wrapping would not end up in the trash 🙂
This tutorial is brilliant and I’ve just made my very first tote, thank you so much! I’m hooked, I’m going to be making totes and other bags all day long!!
Thank you very much for your sharing, I really liked the idea you shared on sewing the ‘X’ on straps, very useful. Appreciate!
I made over 40 of these bags this year for school. Love them! Thanks for the tutorial.
THANKS! I’m new at sewing and just completed an awesome looking bag using plain canvas, this pattern, a very large machine embroidered nautical design and including a zippered pocket, a key holder and a front magnetic pocket. I’m really proud of myself!! THANKS AGAIN for such an awesome tutorial!
I’m a beginner at sewing…I made this bag and everyone thinks I’m a genius!! Thanks so much for the pattern!!
Colleen, that’s awesome! Maybe you are a genius. 🙂
Best tuto i’ve read so far ! I was looking for a tote to embroider my sons’ name on it (for kinder)… Thanks !
So for the bigger bag, would you need about 3/4 yd for the two fabrics? Thanks so much!
Hi Brooke! You’ll need a 20″x40″ rectangle from the lining and from the exterior fabric. So 3/4 of a yard would give you 27″. As long as the fabric is at least 40″ wide that would work fine!
Just made 6 of these bags, and I learned to definitely use the fusible interfacing, makes the fabric sturdier and thus makes the bags easier for the clerk in the store to load, but whichever way you prefer the bags turn out great! Used the old plastic inserts from my old grocery bags to put in the bottom of my new ones. have had many compliments. thanks for the great tutorial!
I also wanted to mention since I used fabric that was on hand from my large stash, the lining of my bags were coordinating to the outside fabrics. when I found my lining fabric was short of the needed size, I cut two strips of other fabric and sewed them to the bottom length of the bag, then cut the squares out of the bottom for the corners. That way when looking at the bag, unless you peered into the very bottom you would not know there was any southern engineering going on! I have to say people will be getting these for presents, they are pretty and so many different fabric options are available. I have also used both the woven and the nylon strapping, both are good.
Promise one last thing here. I was looking at one of my old store bought bags and on the top lip of the bag (you would sew this in similar to the strapping) there is an elastic loop, which the store clerk can use to holf the bag to their plastic bag stand, which would make it even more utilitarian. I will be including those on my next round of bags.
Thanks for the feedback Jenn! It’s great to hear you’re getting so much use out of the tutorial!!
Hello, love your tutorial ! Wish I would have found it before my own attempt, yikes, live and learn :0 are using canvas, or duck for lining and outside? Thank you so much! Trying to make last minute Christmas presents !
Hi Rhonda! The outside fabric is a home decor weight, similar to canvas/duck cloth, and the inside fabric can be anything lightweight or sturdy (quilting cotton or home decor weight).
I want to make a bag like this but with pellon on the inside to make it stiff. I can’t find my pattern on how to do that. Do you have any ideas about how to do that?
Thanks!
Hi Linda, I haven’t tried it before so I’m not sure how to go about doing that. I’d probably try ironing one of the Pellon fusible products to the back of the liner before sewing and assembling the bag. You’ll have to let us know if you figure it out!
Attractive fabric and smart finishing. I wish I could hire you as my sewist. Ha-ha! Just stopping by from Whizurl’s Shop
Yours was the ONLY tutorial that I found which was for the kind of tote I was wanting to make! I am a pre-school music teacher, traveling to numerous child-care centers throughout the week. I needed an extra-extra-large tote for carrying around about 25 large puppets for the children to use during farm/barnyard songs. I could not find anything ready-made on-line, so knew I had to make it myself. Thank you so much for sharing your expertise!
Jane
Texas, USA
Thank so much Jane! I’m glad you found the tutorial useful and I really appreciate hearing from you!
I have read tons of tutorials to make these kind of bags. This is by far the BEST TUTORIAL EVER. The pictures are so helpful. Thank you so much. Now that we need to bring bags when we shop I will be making lots of them . Thanks again.
Thanks so much Gaby, I’m so happy to year you enjoyed the tutorial!!
I just made this bag and love it. Makes me feel extra posh at the shops! lol
That’s great, I feel the same way! Thanks for the feedback, I’m glad you enjoyed the tutorial!
I’m so excited to try this and to show my daughter how to do it! Thanks for posting it again. And, I will definitely take your advice and GO SHOPPING to try it out!
This tutorial is one of the best. Very clear and love all of the comments from years gone by. Needed gifting ideas for a Thanksgiving gathering which will include a gift exchange instead of Christmas. Thanks for reposting as I missed it this first go round.
Thanks so much for this awesome tutorial!! Made 2 bags using this yesterday and am SO happy with them!
Hallo
I have a question.At p.7 and p.10 you wrote “stich alongthe edge…..
Do you mean through both fabrics – the outer fabric and the liner?
I hope you understand, my English isn´t so good.
I’d say stitch along the edge of both!
Yes, stitch through both the outer fabric and the liner (and your English is perfect)!
Thanks so much for this tutorial. I just made four from thrifted yardage.
Awesome!
Great tutorial. I got upholstery material for $1/yard and it made great bags. I’ve got 2 sewn and plan to make some for gifts. Thanks!
Could you please tell me the measurements of the bigger bag when it’s done? (Height X Width X Depth). Thanks for this well done tutorial
What a nice and fun way you wrote this and easy to follow.
Have a great day